Now that you have made sure your FileMaker files were secured, you can safely upload them to the cloud.
Here is a step-by-step explanation:
1) If you haven’t done so, make sure your files are correctly secured.
2) If your files were previously hosted on a server, the most efficient procedure is to download these files from the admin console of your old server to your computer. The advantage is that any container folders will automatically be well positioned for uploading, which is not the case if you use a backup. The procedure is explained here.
3) Make sure that external containers are visible when you open the file locally. If they are, the FileMaker Pro upload process will handle them automatically.
4) If a previous version of the file is already hosted on the server, make sure to remove it before uploading the new version.
5) You can now upload your files. This should be done with FileMaker Pro, from menu File/Sharing/Upload to Host…

6) In the Upload to Host dialog:
-
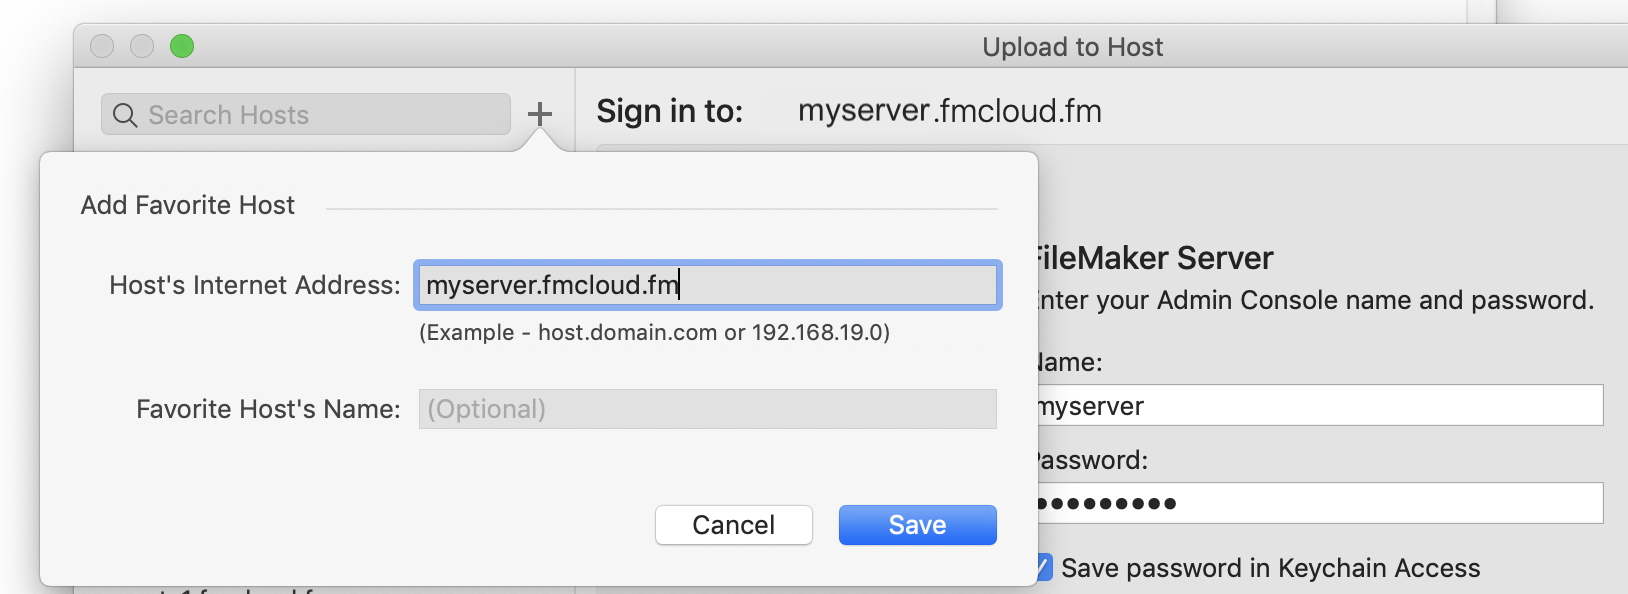
- If you haven’t yet done so, add a host by clicking the + icon
- Enter your server address (yourSubdomain.fmcloud.fm)
- Click Save
- On the right, enter your credentials and click on Sign In

7) In the Next (final) dialog
- If you have a Starter plan or a Pro plan only: At the top of the window, click on Change and choose the FMS_DB directory (you can create subdirectories there if you wish)
- By clicking the Browse button, you can select one or more files. To select multiple files, hold the shift key while selecting them. You can also add them one by one. Only the .fmp12 files need to be selected. If there are Container folders next to their corresponding FileMaker file, they will be uploaded automatically.
- Click Upload
- Once the upload completed, and option allows you to open the files directly in FileMaker Pro.
-
If you encounter any issue or have questions, do not hesitate to contact our support team.

